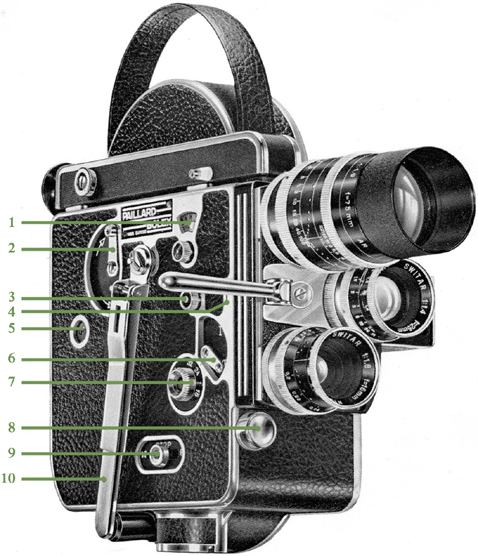
Figure 1. H16 Reflex Principal Controls

Paillard-Bolex H16 Reflex
Frame counter
Spring motor clutch lever
Electric motor and crank shaft
Film plane mark
Footage indicator
Control lever for instantaneous (I) and time (T) shots (in case of single-frame exposure)
Speed control
(Front release) Filming button
(Side) Release control, (M) = continuous release, and (P) = single-frame exposure, which can also be operated by cable release
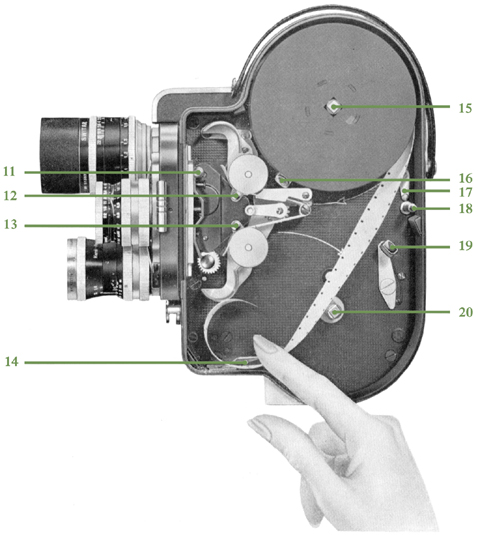
Motor winding handle (power reserve: 40 secs. at 16 FPS)
Figure 2. Cutting the Film

Above: Using the film knife (14), the film is cut at a slight angle for insertion into the film channel (23, below.)
Pressure Pad Locking Pin
Upper guide channel locking pin
Lower guide channel locking pin
Film knife
Feed spool shaft
Upper retaining arm
Audible footage indicator control
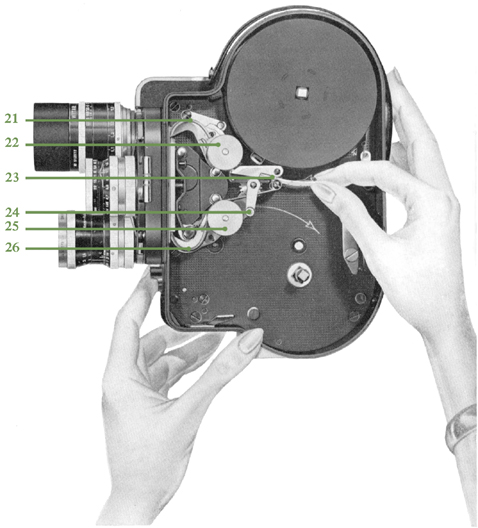
Footage indicator re-set
Lower retaining arm
Take-up spool shaft
Figure 3. Loading the camera: Introducing the film into the funnel

Note: When loading film, the loop shaper lever (24) is moved 90 degrees counterclockwise (parallel to the pressure pad), closing the loop shapers.
Upper loop shaper
Top sprocket wheel
Funnel
Loop shapers control lever
Lower sprocket wheel
Lower loop shaper
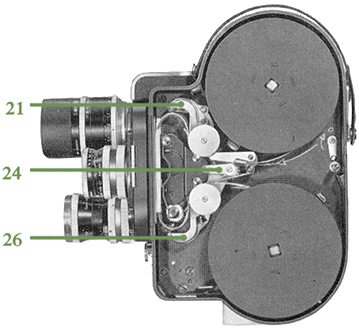
Figure 4. Camera ready for use

Above: After the film is loaded, the loop shaper lever (24) is pushed back up into position, opening the loop shapers. Replace and lock the film door, and your camera is ready to shoot!